Lighting Mannequin
Opening Notes
This article is dedicated to the people who made Mannequin possible. Such an amazing team that was never afraid of testing new ways of doing things. Without that mindset we would not have created the Lumen to GPU bake lighting workflow, or any of the other ideas and solutions you’ll see here.
Lighting Goals for Mannequin
When we were developing the multiplayer VR title Mannequin for the Quest 2, we realized early in production that lighting design would play a crucial role in the project.
We wanted lighting that looked good while still staying within the tight performance budget of the Quest 2.
One of the most important parts of the game is guiding players through dark, maze-like levels. The experience can shift at any moment from slow, thriller-like tension to fast-paced shooting, and when that happens, it’s vital that the player instantly understands which optional routes are available.
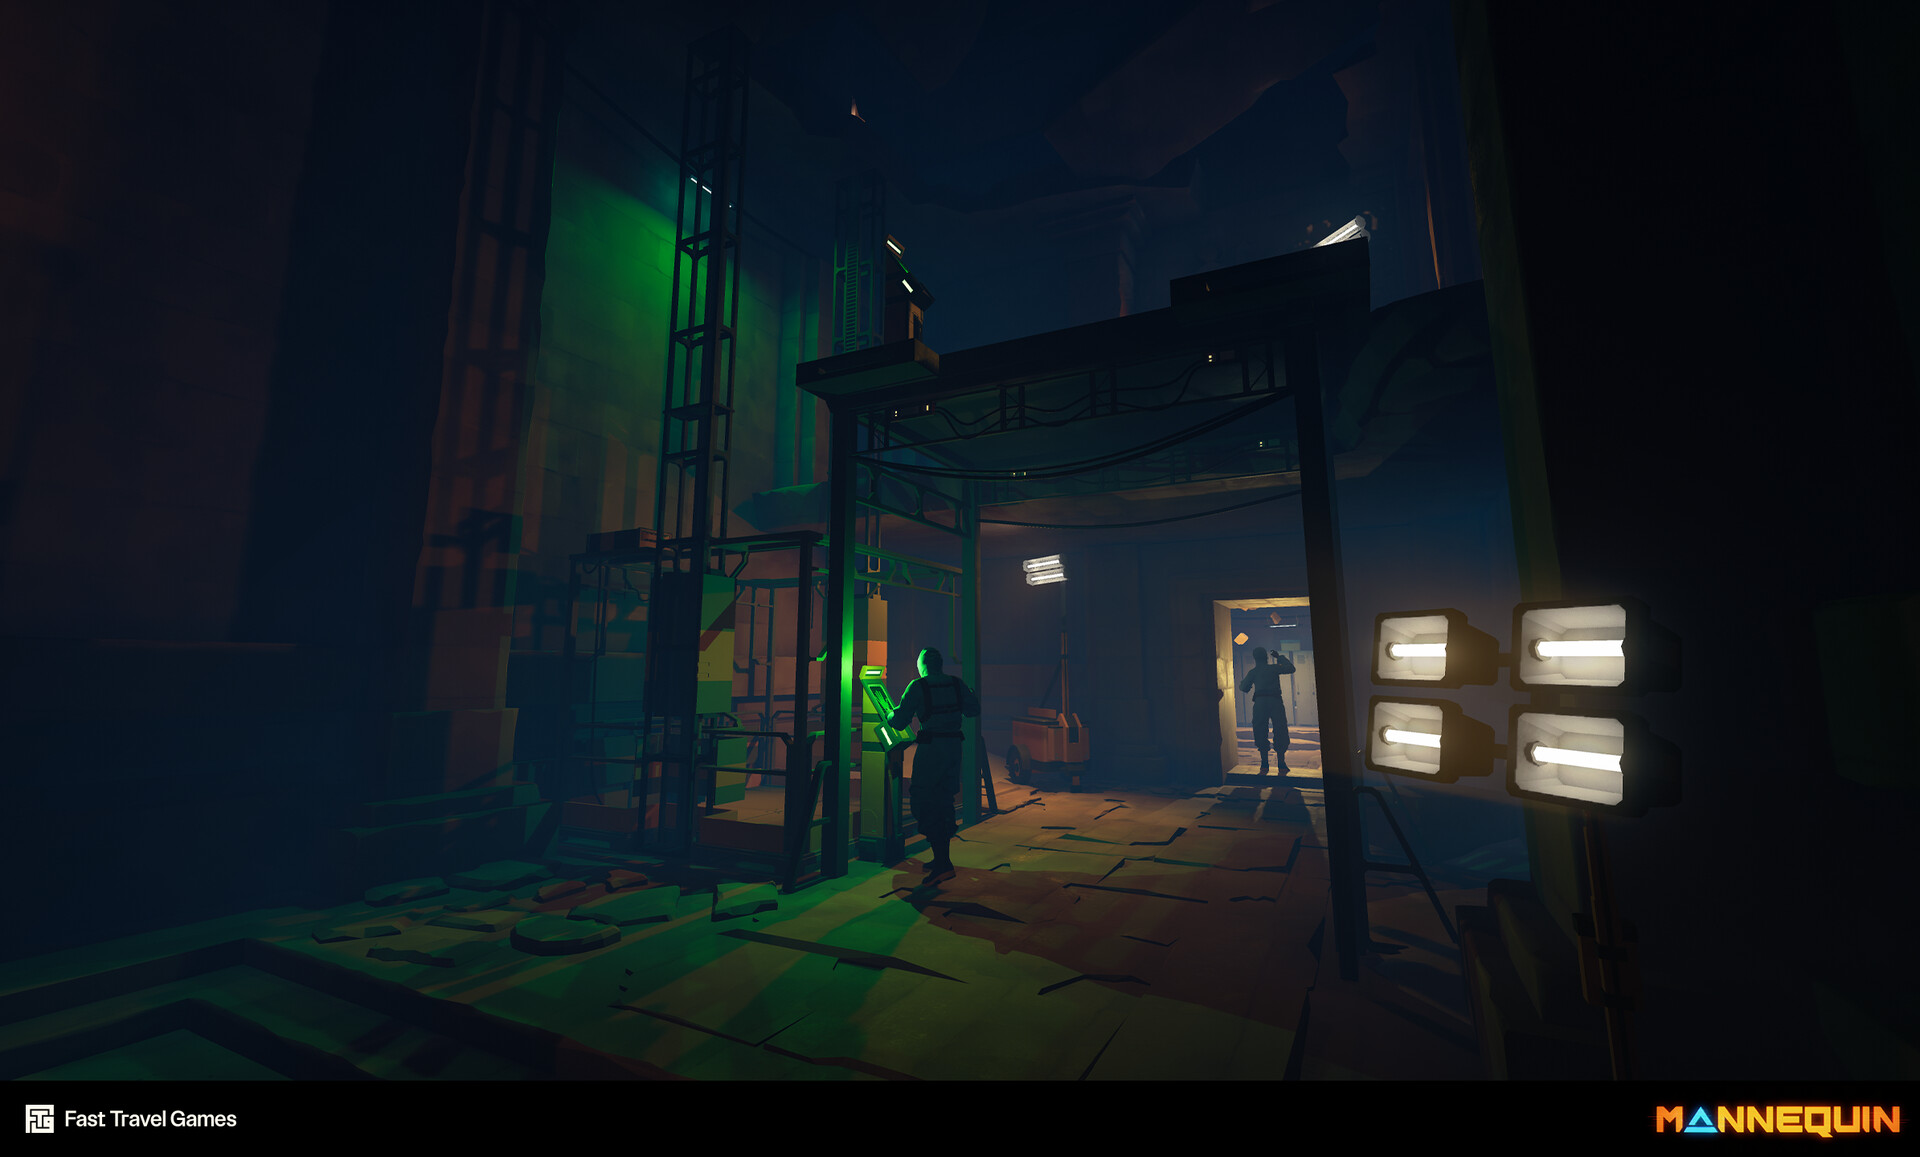
Image from Ermioni Pavlidou
The game is built from many modular pieces (which is a challenge on the Quest 2 in itself, but that’s another story). Because of this, light quality could easily suffer, and avoiding that became a top priority.
We also knew that baked lighting is tedious to iterate on and incredibly slow. We learned this during the development of the Quest 2 title Vampire: The Masquerade - Justice.
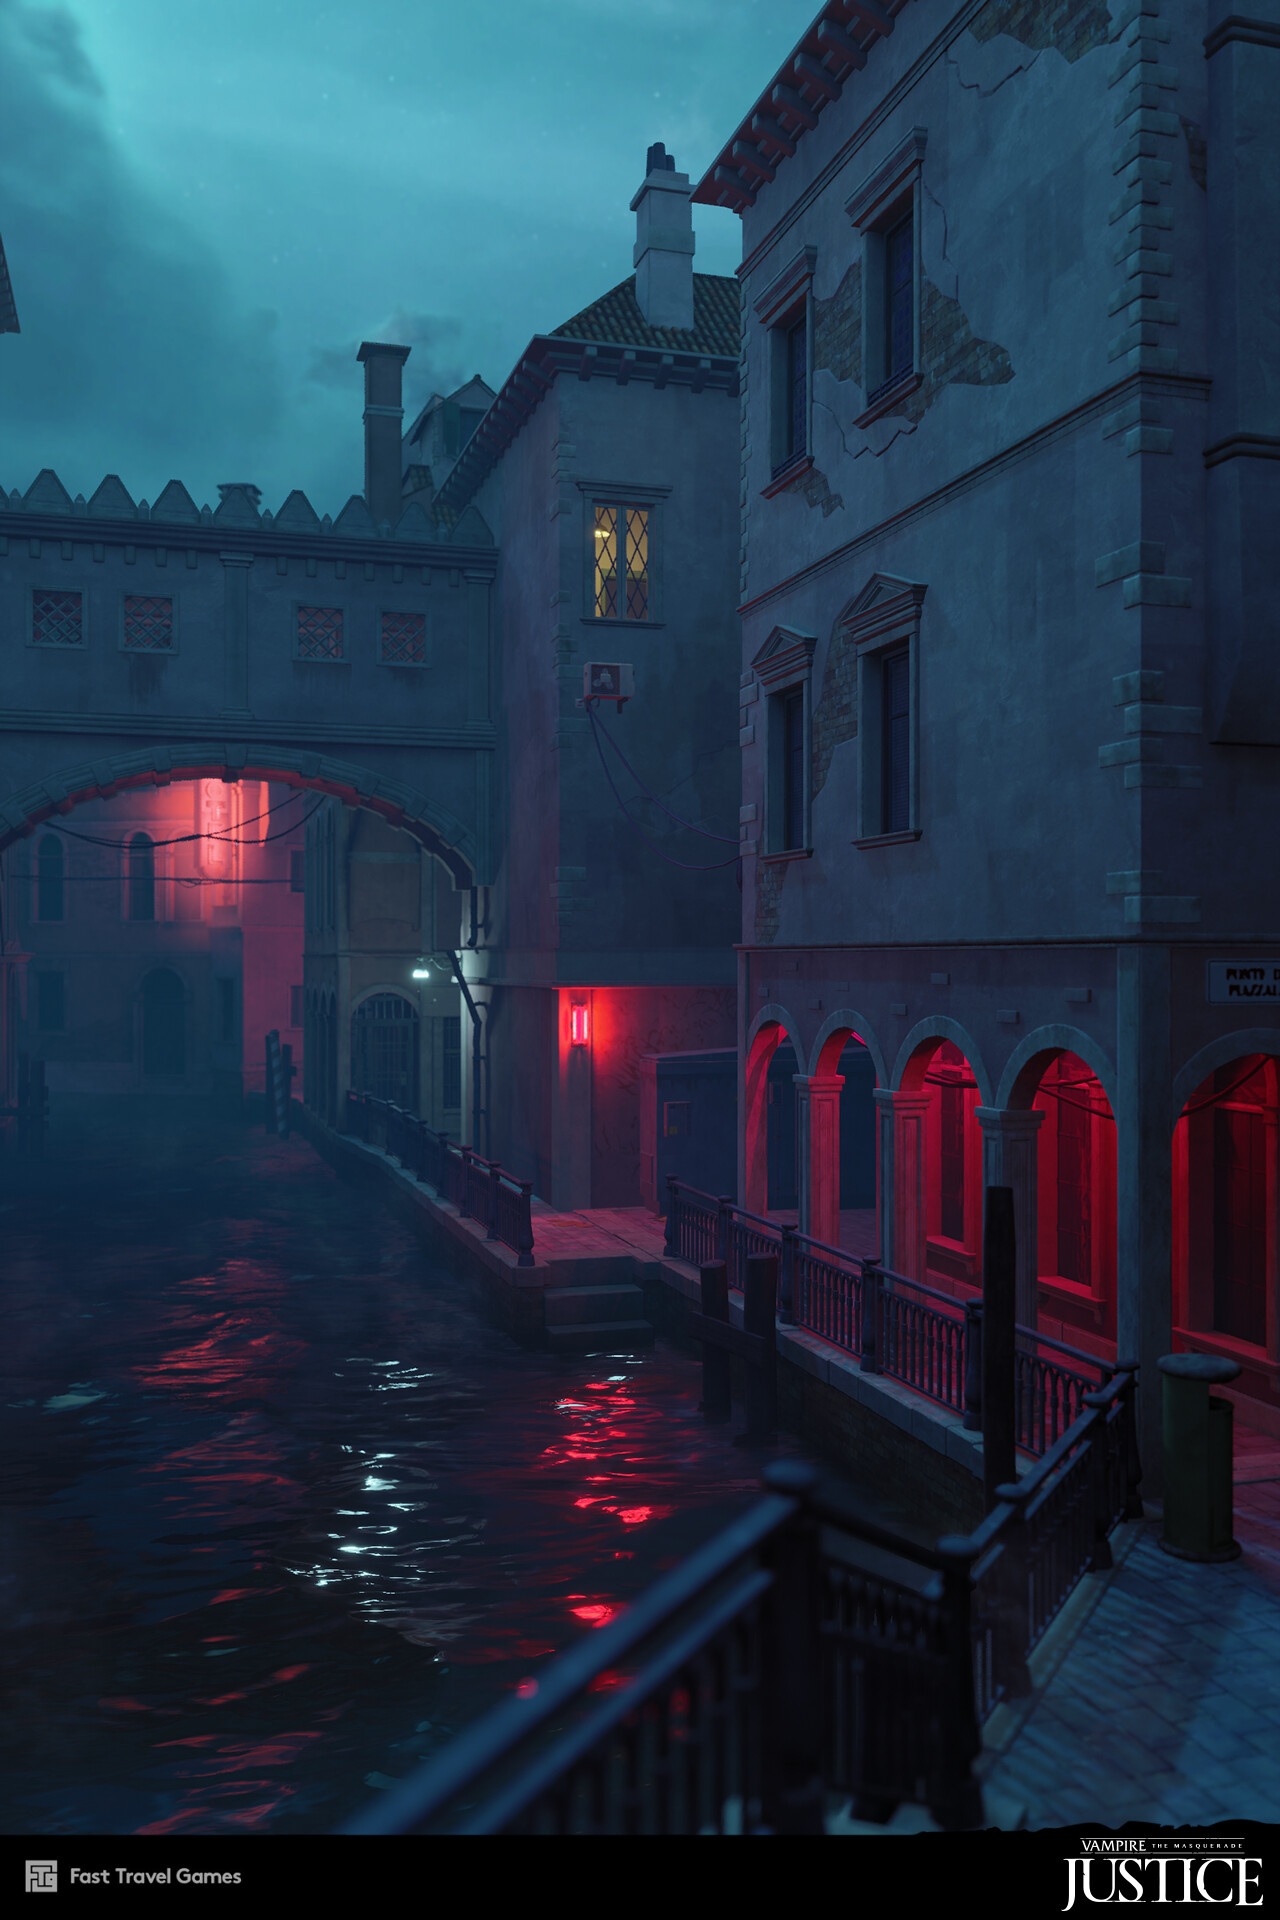
Screenshot showing baked lighting from Vampire Justice. Images from Amanda Gyllin
Heavy use of HLODs made iteration even more painful. During that project, I pushed to switch from CPU to GPU baking, since CPU bakes took far too much time. But I joined mid-production, and GPU Lightmass didn’t support manually edited HLODs at the time, that was one of the reasons we had to drop the idea for now.
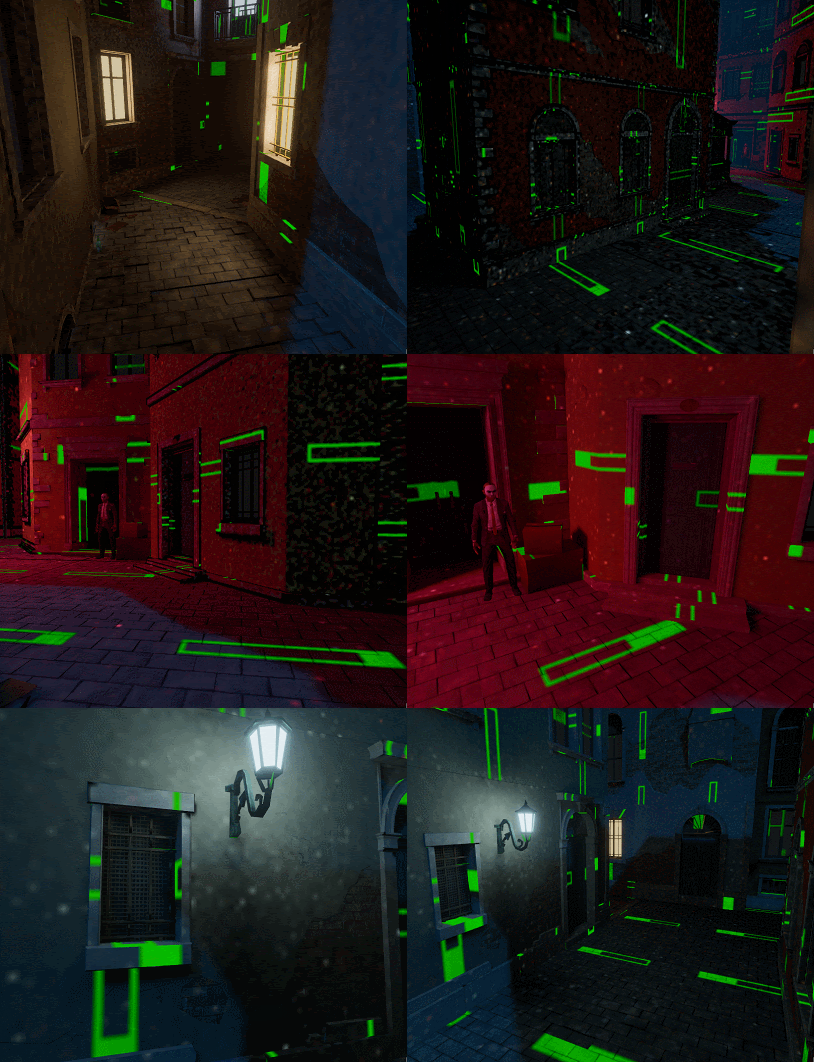
GPU baking using the “Bake What You See” setting on Vampire: The Masquerade - Justice:
Experimenting with Lumen
Mannequin’s lighting design uses a saturated color scheme that communicates gameplay states and paths very clearly. This meant a lot of careful light placement and constant tweaking. Whenever level design changed, the lighting usually needed a full overhaul. A thriller shooter like this needs a very iterative design process, and fast lighting iteration was essential.
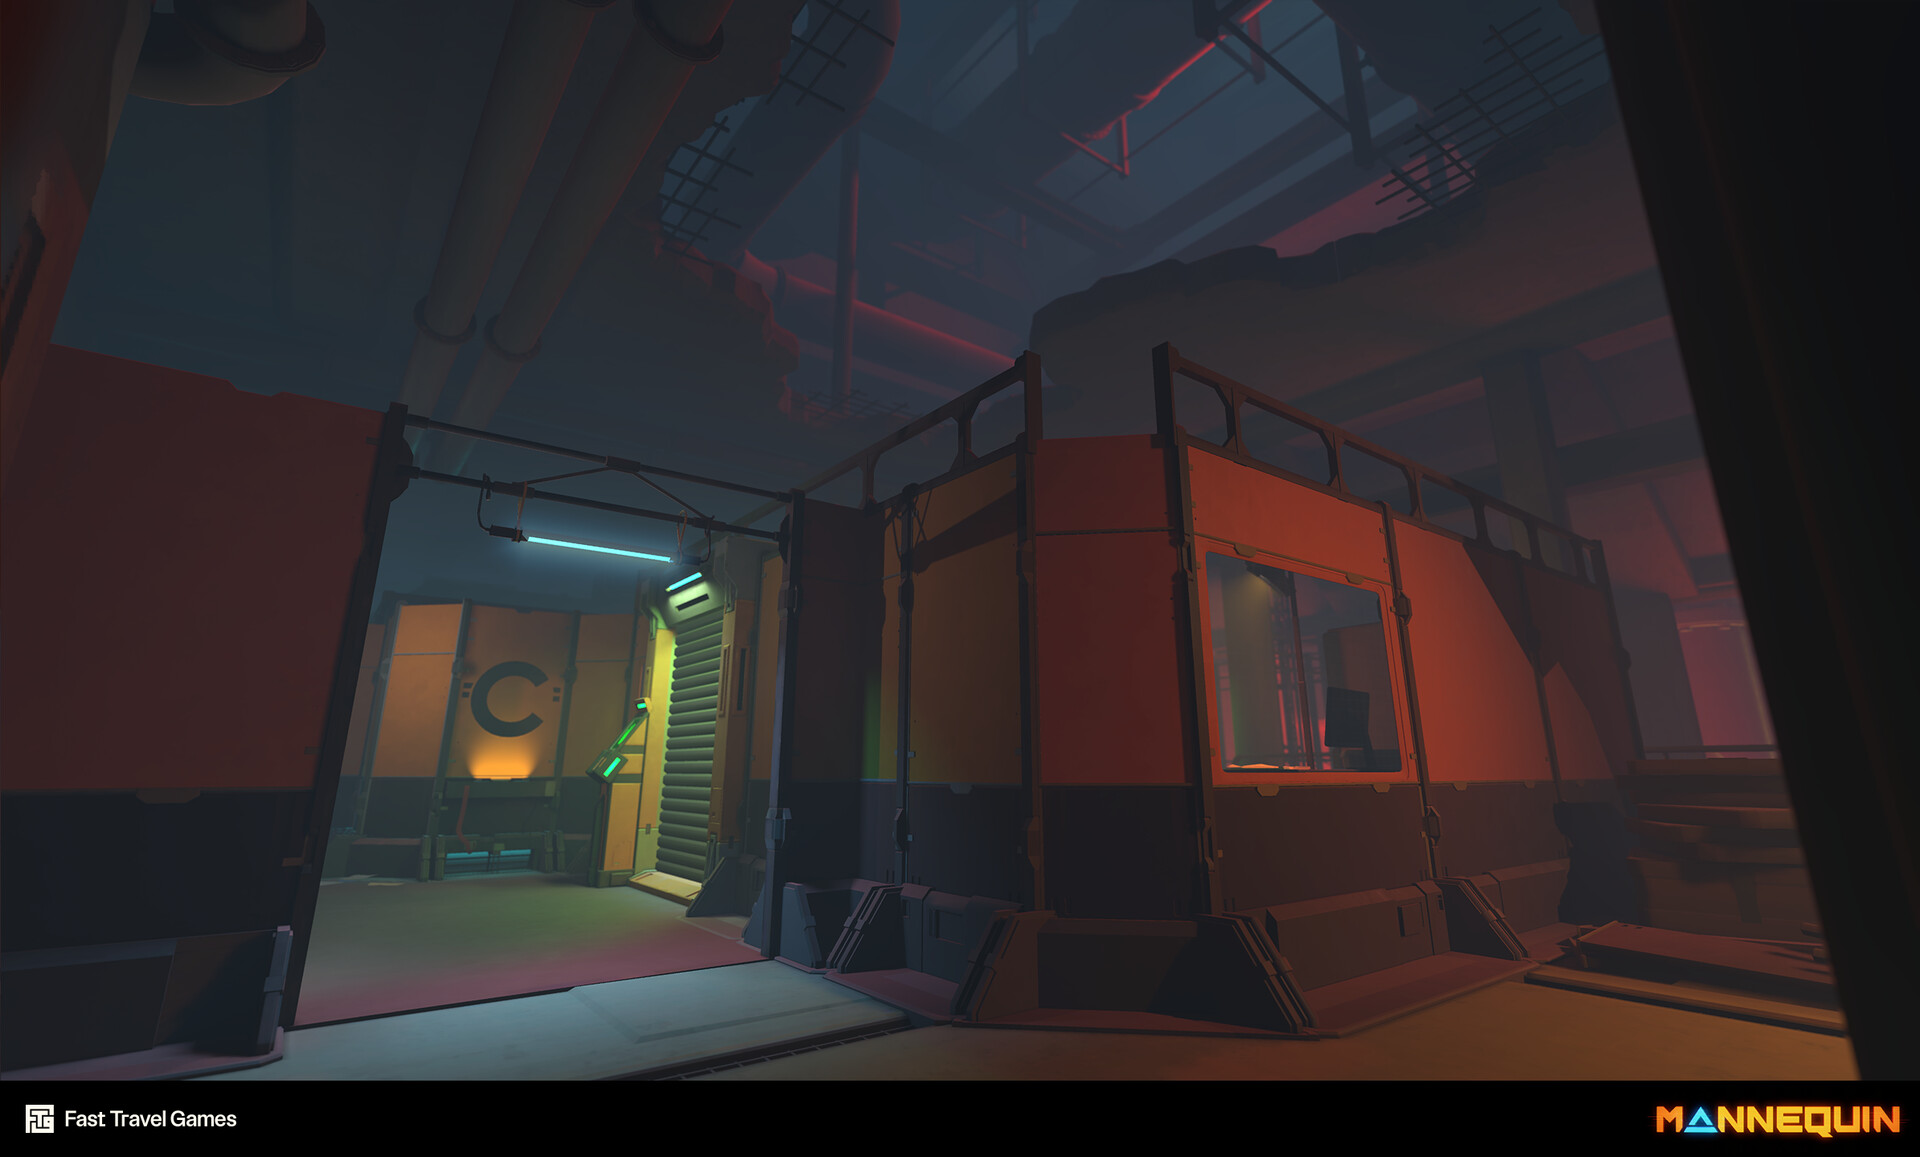
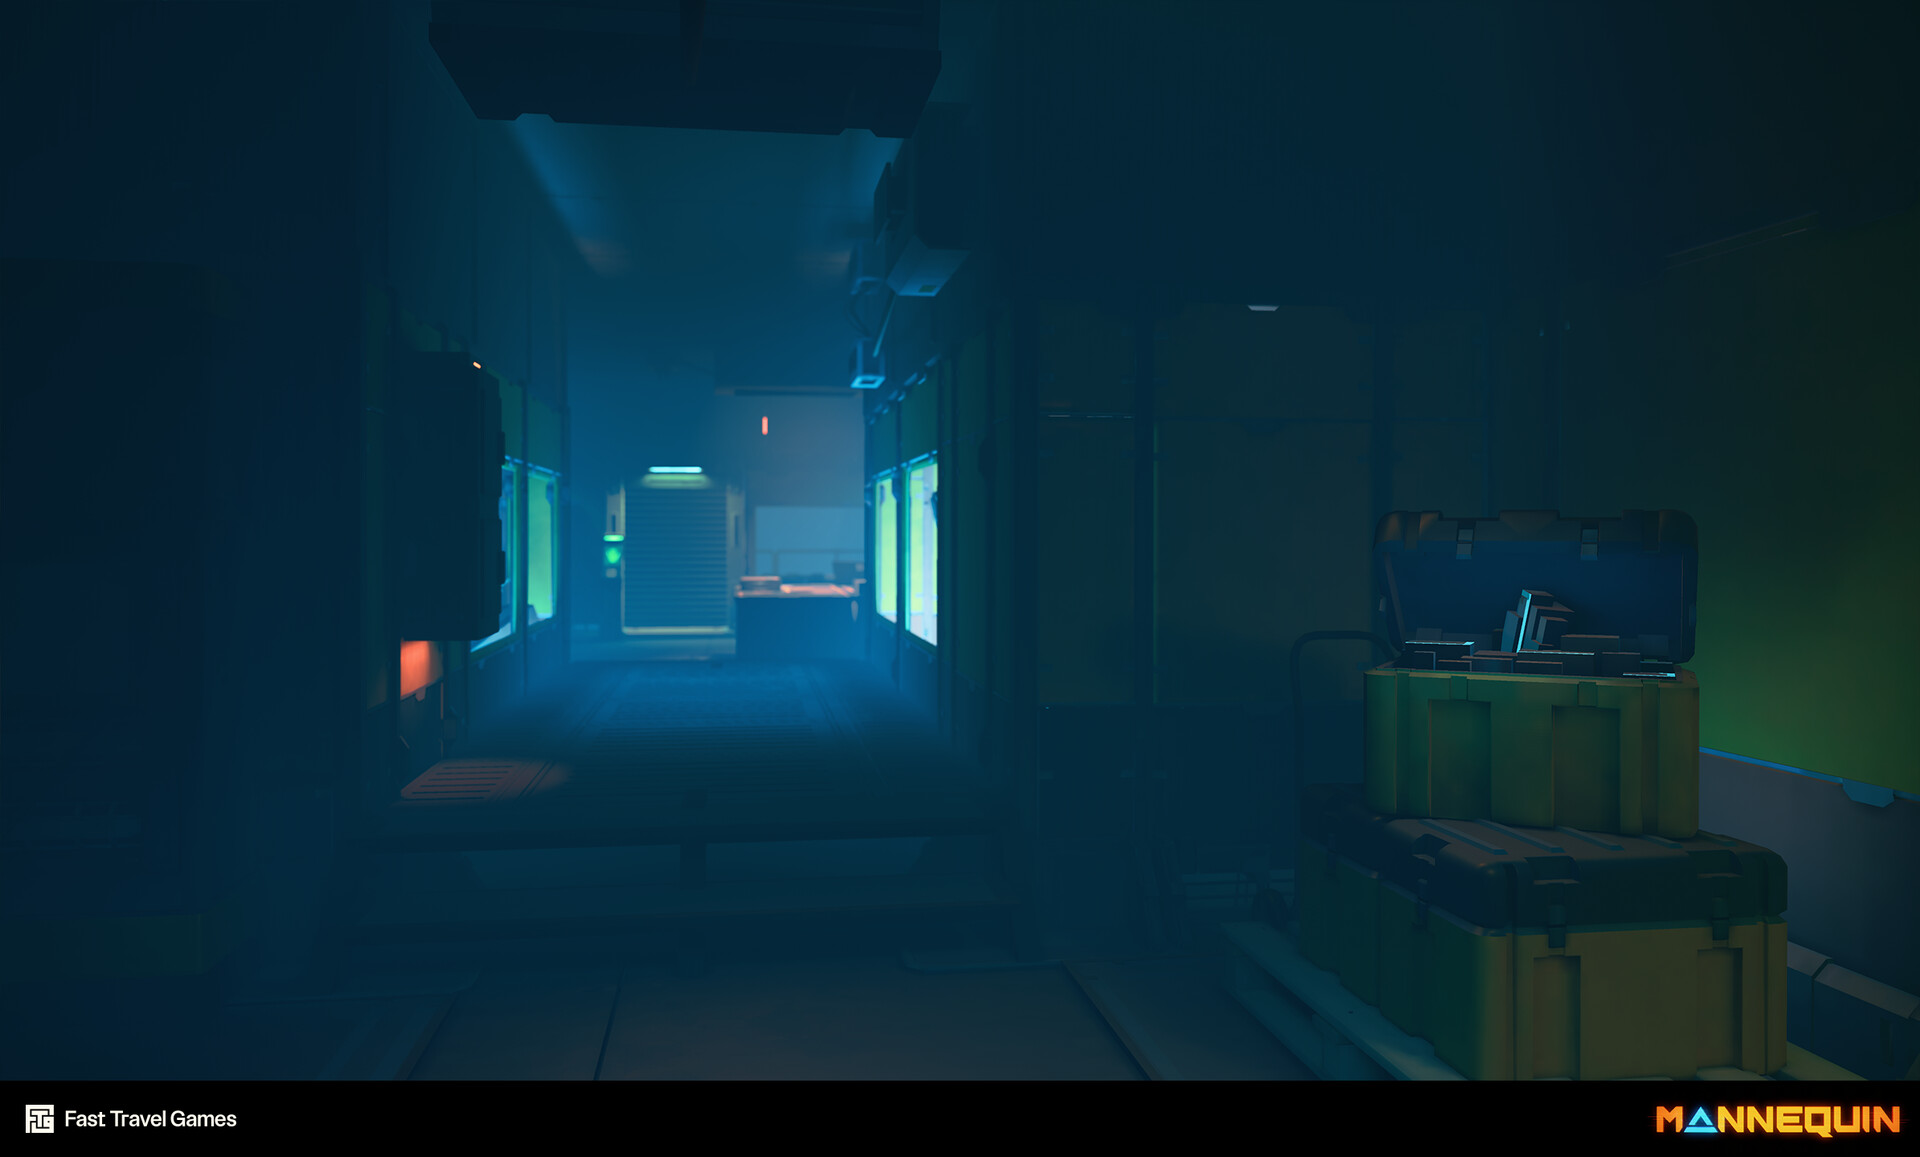
Here are some screenshots showing lighting scenarios from Mannequin. Images from Amanda Gyllin
Around this time Lumen became available. The team started evaluating it, not because we expected to use it in a VR production, but because the workflow speed was incredibly appealing. That sparked an idea: what if we could use Lumen during development and then switch to baked lighting while keeping a similar look?
Since we didn’t have anyone working full time on lighting design, Lumen’s quick workflow was even more tempting.
At first, this seemed impossible. CPU Lightmass and Lumen behaved too differently, and the results weren’t close enough. After several tests, we dropped the idea.
Later, we decided to switch to GPU Lightmass for the speed. The small quality loss from GPU baking wasn’t noticeable with our stylized look, so the timing was perfect.
Epic also made it clear that GPU Lightmass would be supported going forward and that CPU baking was slowly becoming outdated.
Switching to GPU Lightmass was almost frictionless (aside from the need to upgrade our graphics cards), and everyone appreciated the much faster bake times.
Lucky for us, we had an AD who was technically inclined and decided to revisit the mismatch issue with Lumen and baked light again. And this time, thanks to GPU Lightmass, the results were much closer!
That’s when we began building a pipeline that used Lumen’s fast iteration during development and GPU Lightmass for final baking.
Lumen and GPU Lightmass
Our goal was to compose lighting in Lumen, bake it to static once it felt right, review the result, and quickly make adjustments again. We wanted the baked result to stay as close as possible to the Lumen preview.
To make this work, we committed to a few rules:
- Lights needed specific settings that kept Lumen and the baked result in sync.
- Vulkan Preview had to be one click away so we could switch between real-time and static lighting with no friction.
- GPU Lightmass became the default since it’s faster than CPU Lightmass and produces results that align closely with the Lumen look.
- Post-process settings needed to switch automatically between modes.
- Rely on generated LODs rather than hand-authored ones.
We started creating a tool that made the loop between real-time and static lighting easy and accessible for everyone. This tool handled a lot, but one of its most important tasks was toggling settings on all scene lights. Some of the most important changes was to switch them between Movable and Static, lock Indirect Lighting Intensity to 1 and set Lighting Attenuation Radius large enough to cover the full bounce area.
We used Vulkan Preview to flip between baked and dynamic lighting, but there was still too much of a visual difference between the Vulkan renderer and the native Forward Renderer.
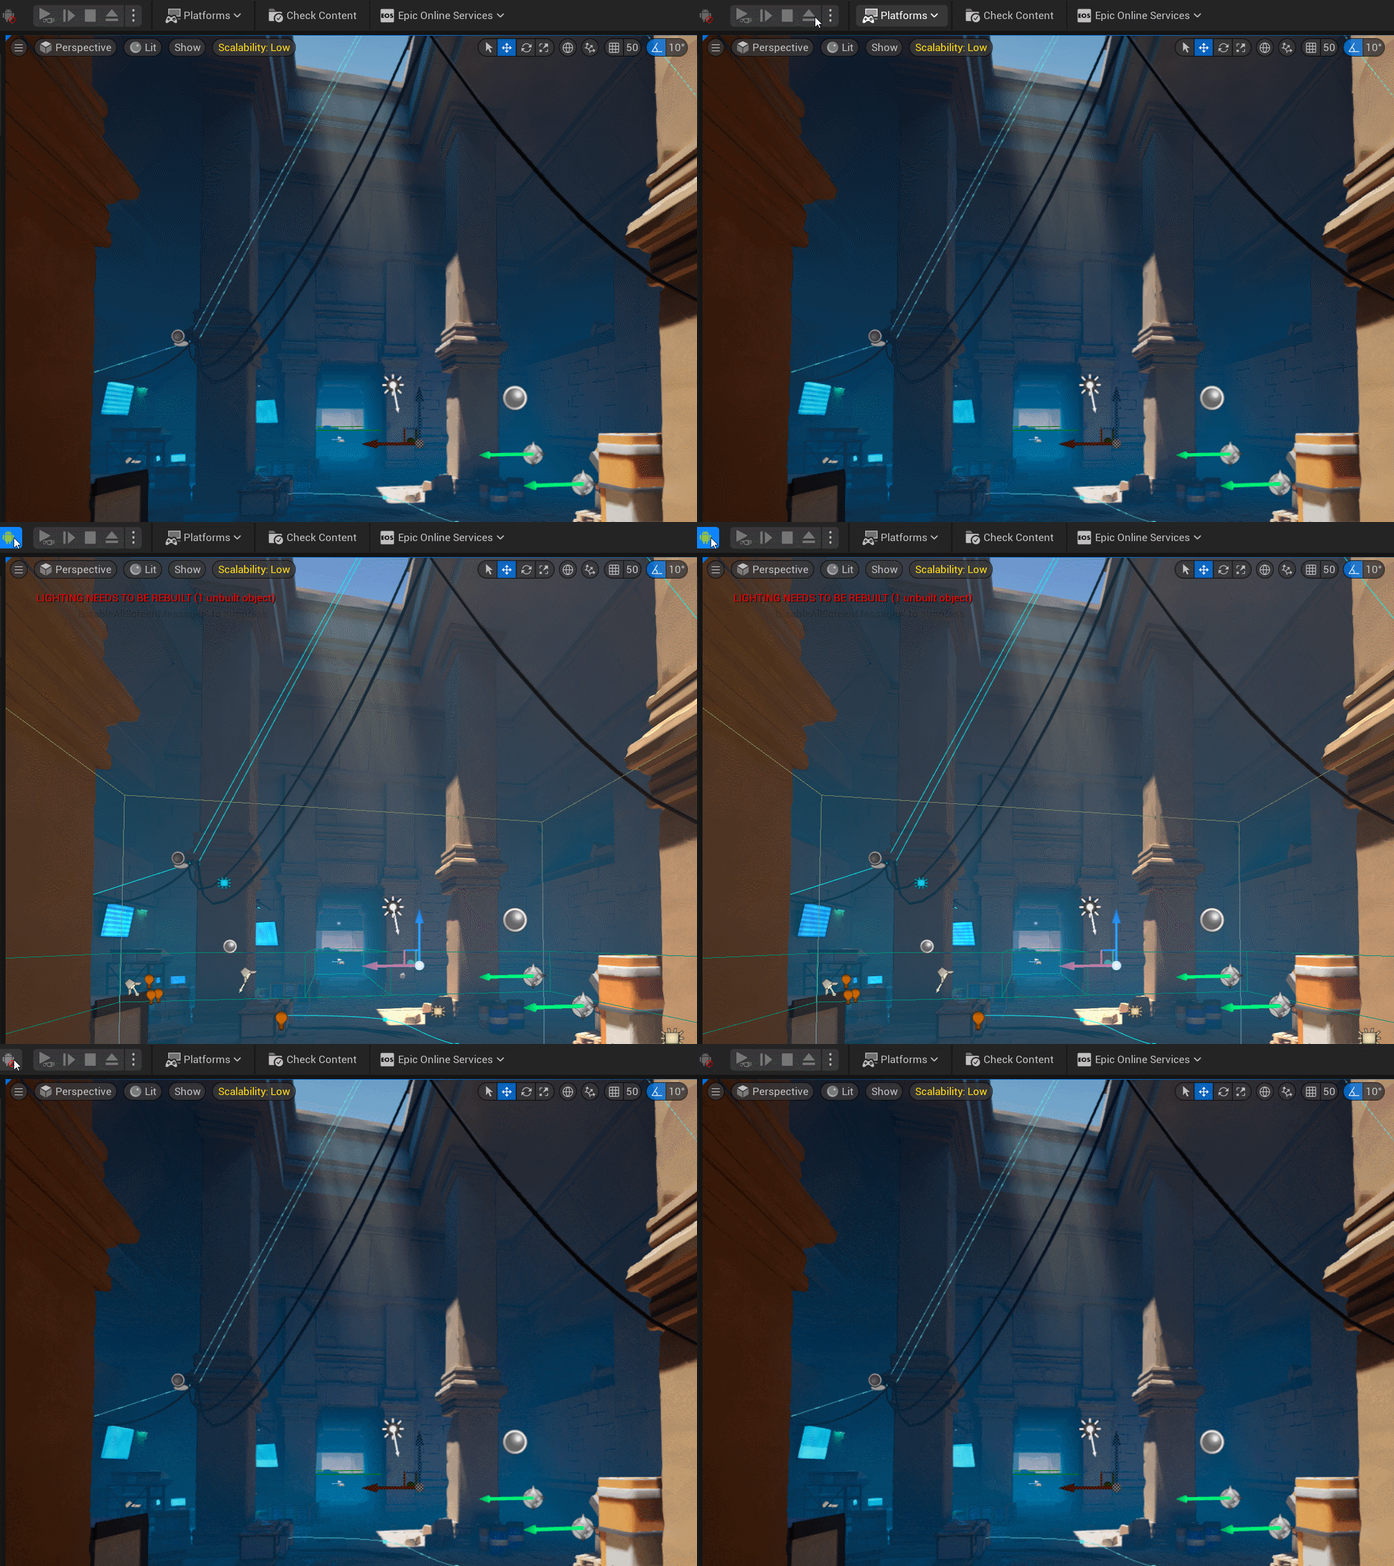
Comparing Vulkan and native Forward Renderer with post-process disabled.
After carefully investigating and tweaking Bloom, Color Grading Tone Curve, and Color Mapping, we ended up with something close enough for our needs. I think we could’ve pushed it further with more investigation, but this level of accuracy was acceptable for us.
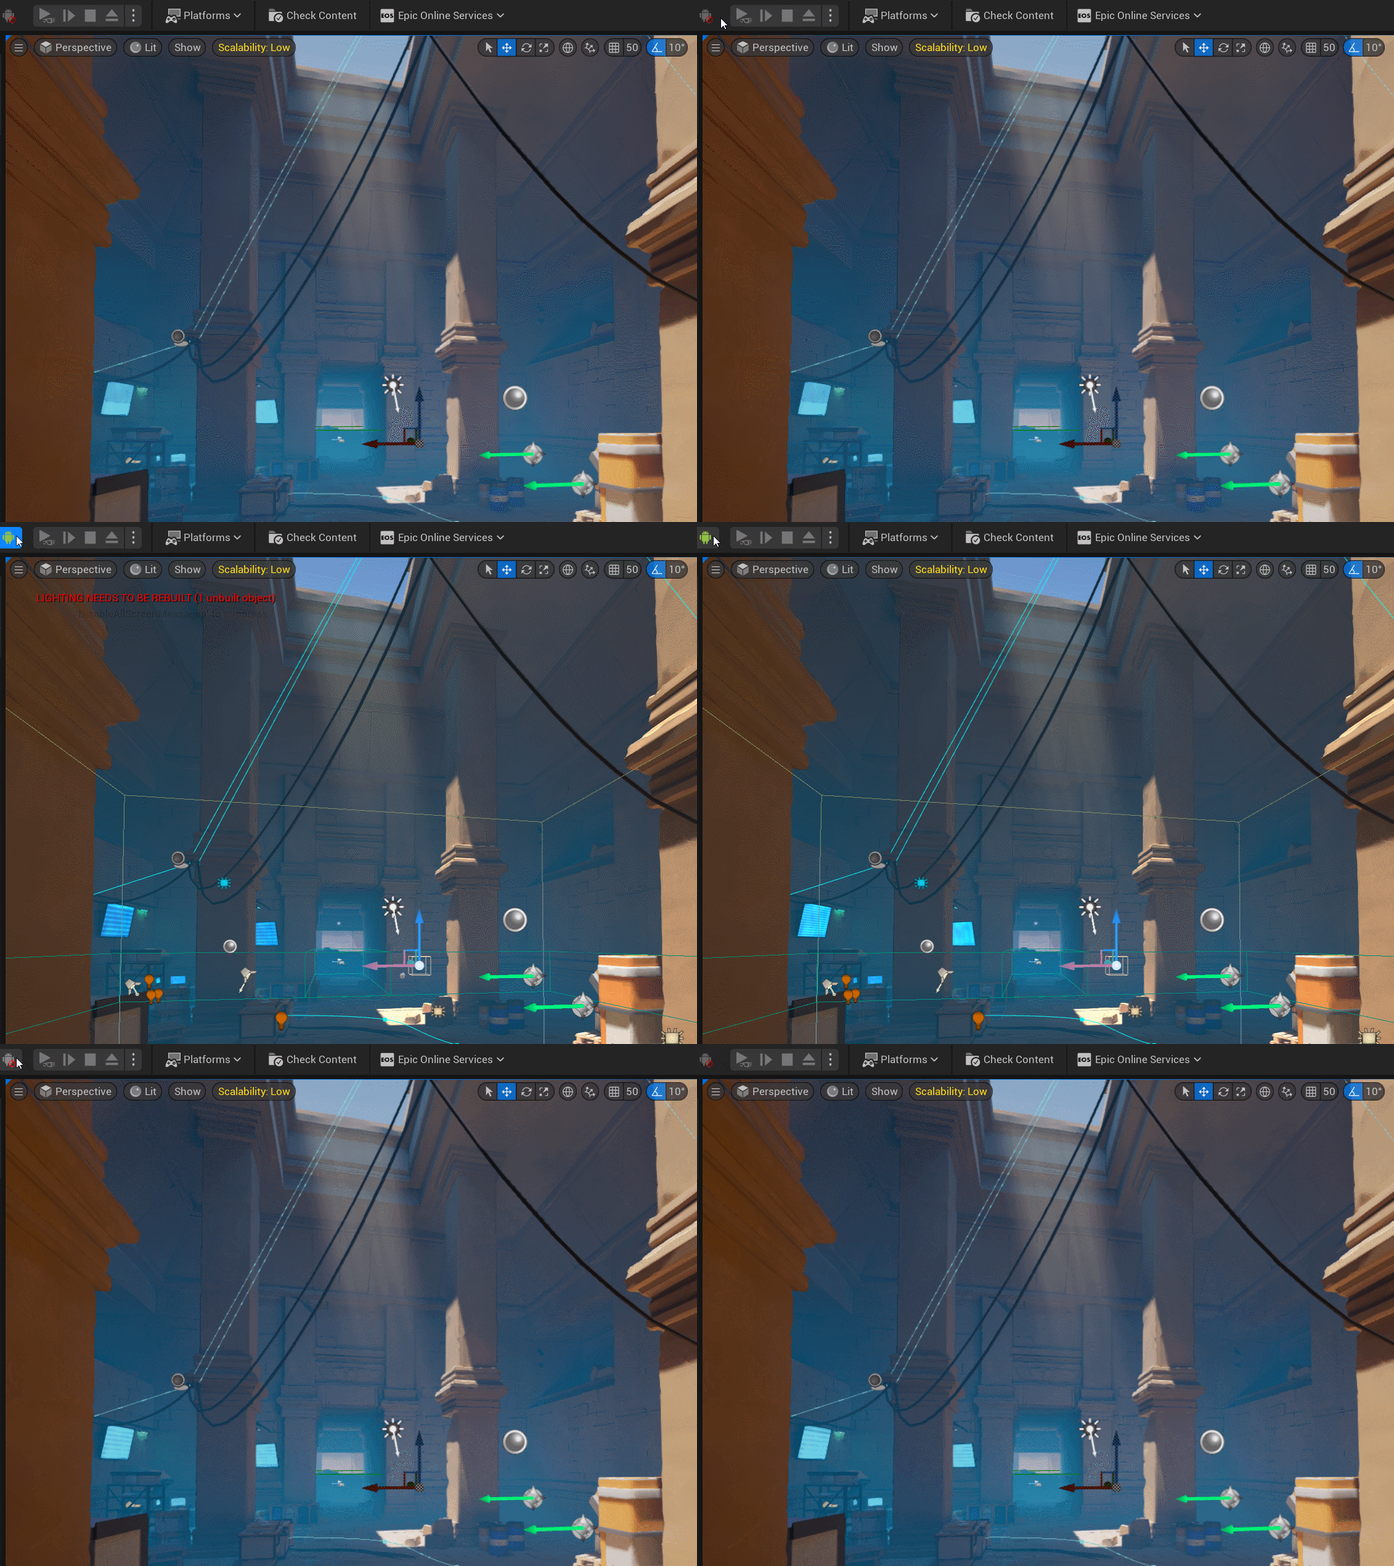
Comparing Vulkan and native Forward Renderer with tweaked post-process settings.
At last, a result that was almost identical and a smooth workflow!
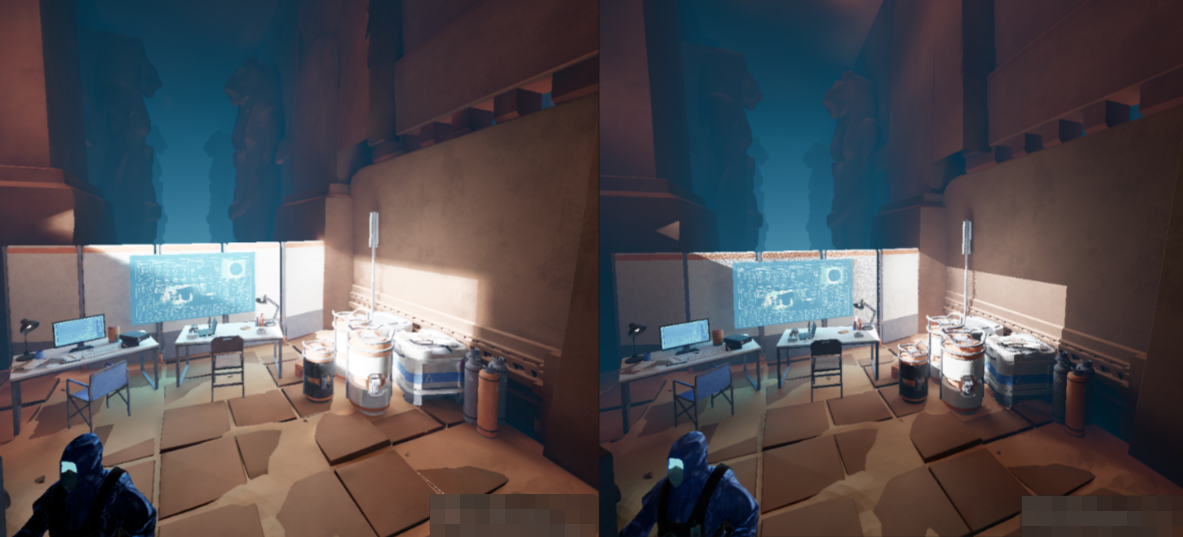
Comparing Lumen and Static lighting. Lumen on the right.
Light Shafts without Volumetric Fog
Forward rendering doesn’t support local volumetric fog, but we still wanted good looking sun shafts in our project. We also had another challenge; we didn’t want a single global sunlight direction. We wanted the freedom to let the “sun” shine in different directions in different areas of the levels, simply because it gave art direction more control over how each space was lit. To solve this, I built a small Geometry Script tool that creates a mesh and extrudes it based on the rotation of a directional light.
Showing the debug material on the generated light shaft.
We added this feature to the lighting tool. When you baked the lighting, the sun shafts were baked into static mesh assets and replaced the dynamic mesh with a static actor. When you wanted to edit the light again, the system reverted back to a dynamic mesh that updated automatically with the light’s rotation.
The material relies on distance (I used distance fields on PC for better precision) and uses fresnel for fading. This prevented clipping and kept the effect from looking flat or two-dimensional. The result turned out better than expected, so we used the technique in the PC version as well.
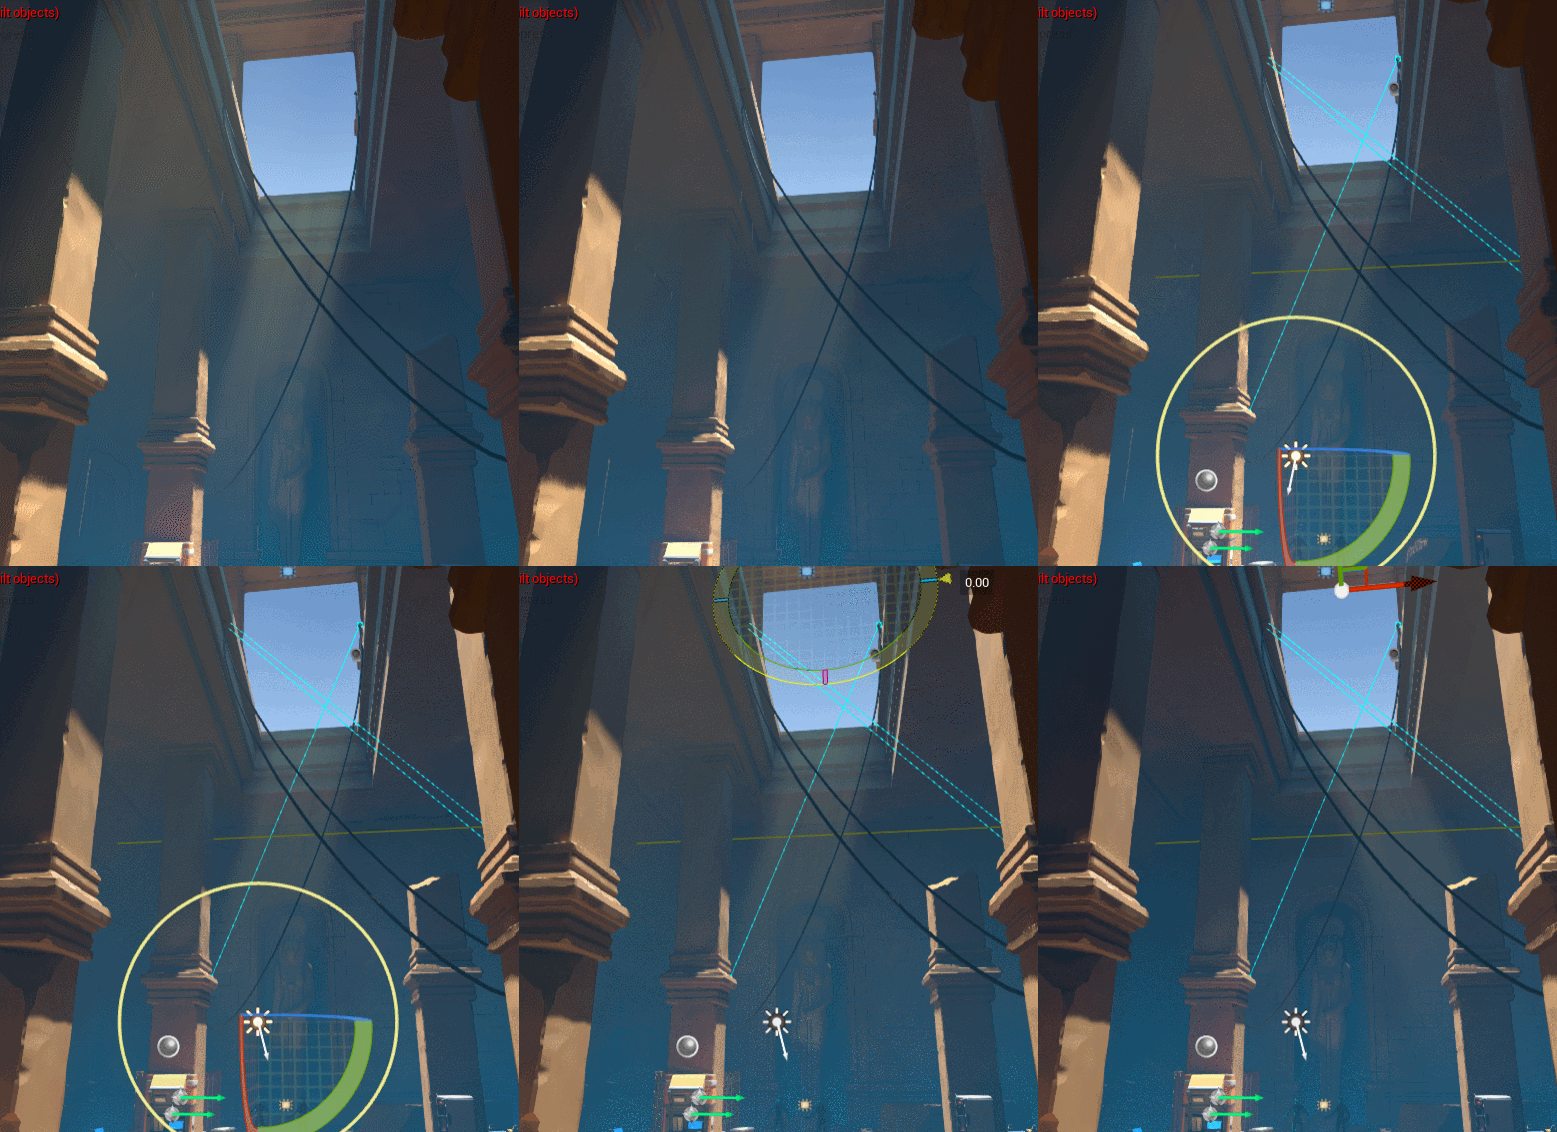
Showing the light shaft tool automatically updating with a directional light’s rotation.
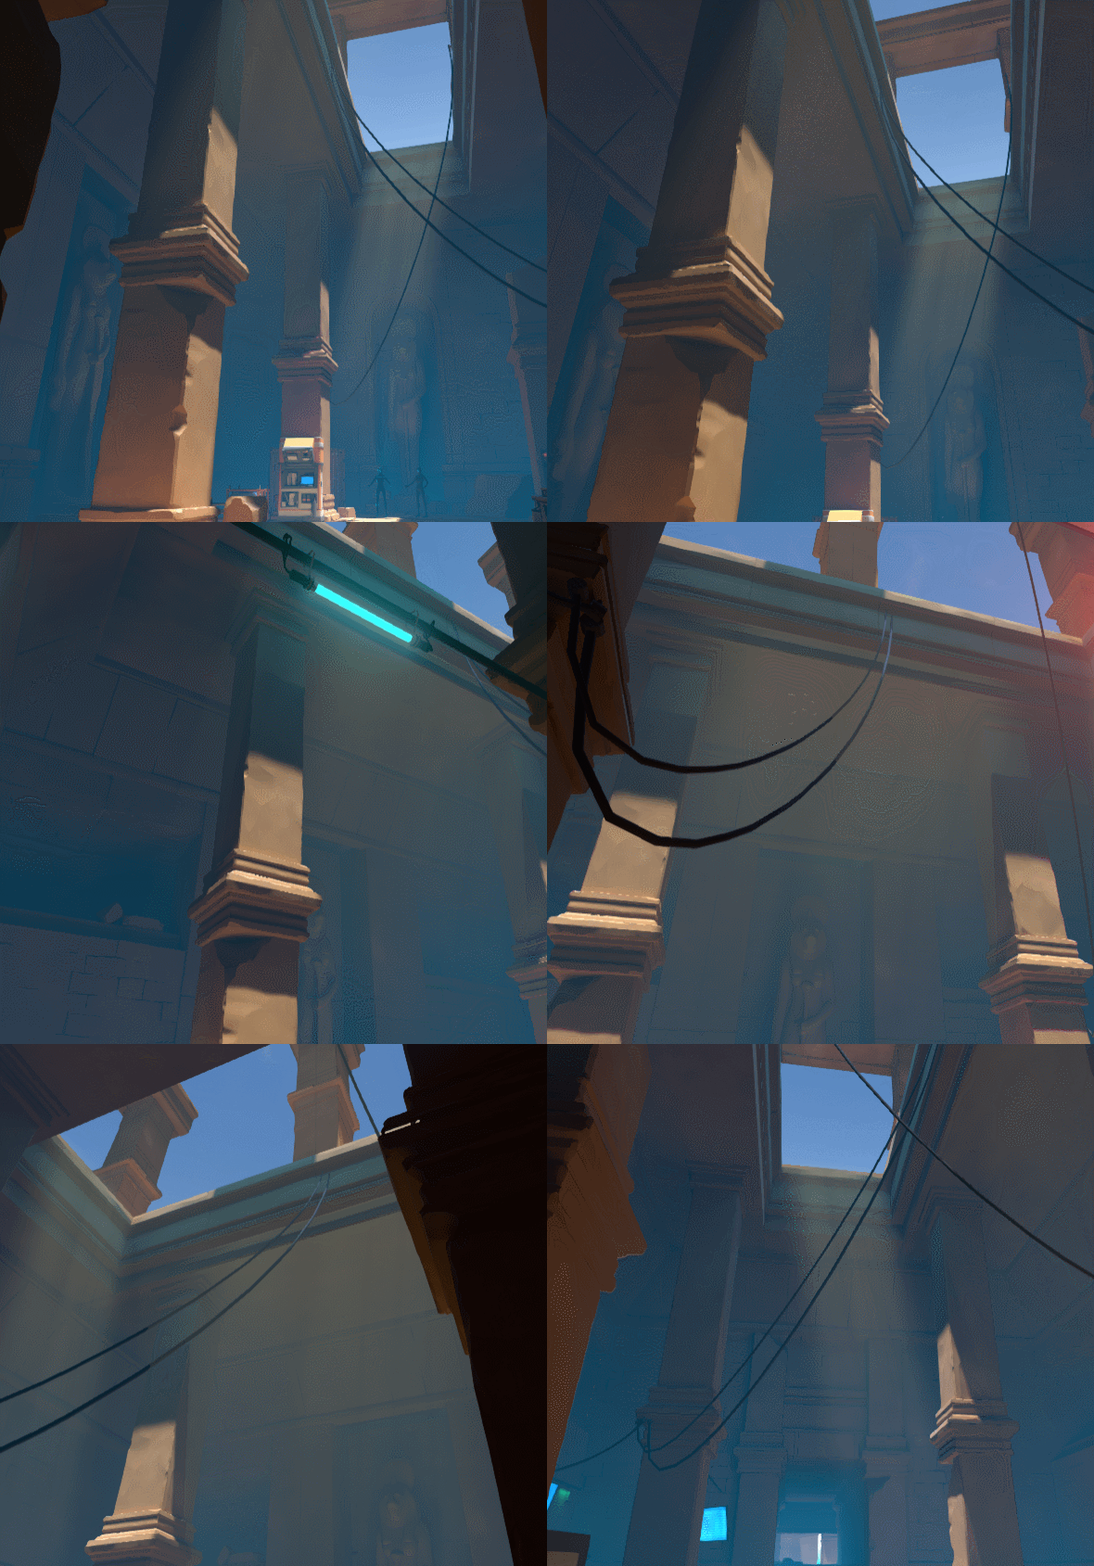
Light shaft final look.
Bloom without Mobile HDR
Mobile HDR enables post effects like bloom, but it was too expensive for our Quest budget. Instead, we faked bloom using the GlowingQuad Plugin. It uses a single quad that folds its sides based on the camera angle.
With careful use, it looks convincing and costs almost nothing. You can use any material as long as it doesn’t rely on vertex color, since the GPU version of the plugin uses vertex color for the folding system.
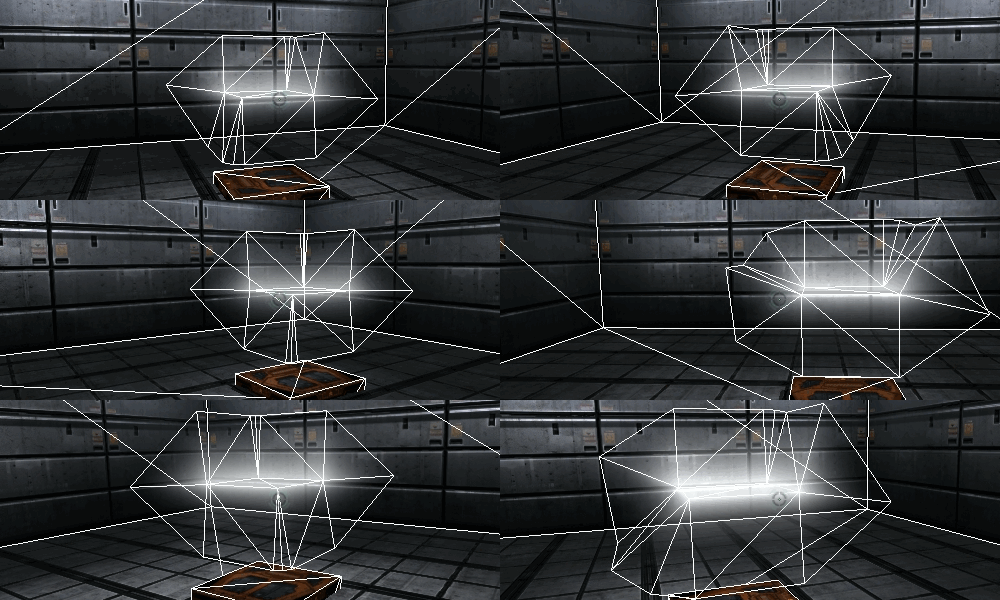
Showing the folding technique.
Image source: https://simonschreibt.de
The technique was simple to implement. We used this on emissive features like screens and lights, kept the intensity subtle, and favored flat shapes. I love it when old-school tricks like this makes a comeback.
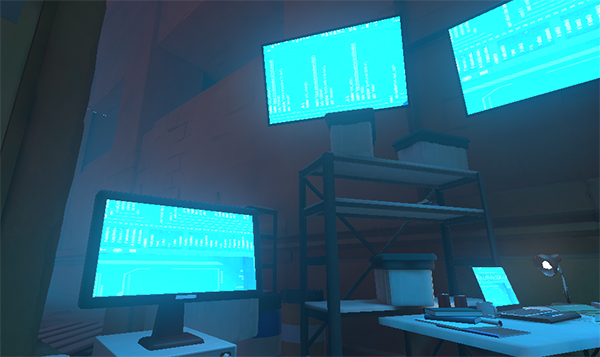
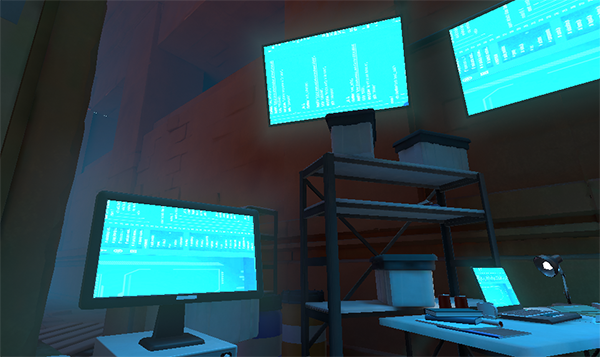
Comparing PC post-effect bloom with the fake mesh bloom on device. First image is post-effect. Second image is mesh bloom.
For round features like the glowing eyes on the time-frozen characters, we used Dynamic Blob Lights & Shadows They feel volumetric and cost very little.
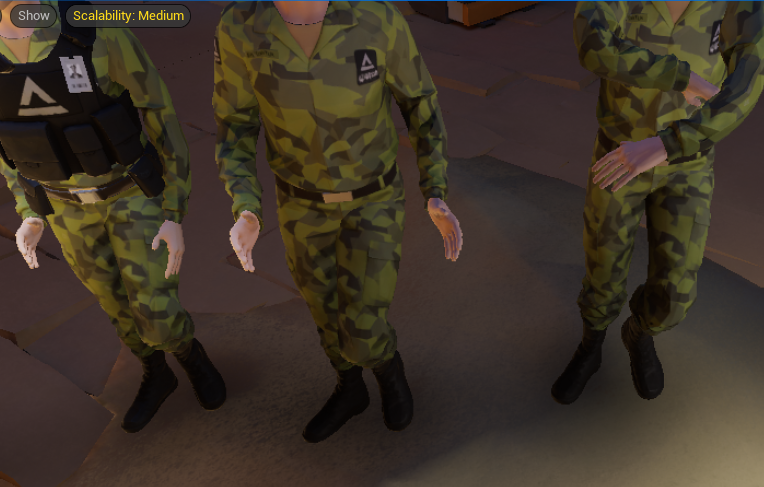
As a bonus, we used the modulated version as contact shadows for the time-frozen characters.
Fake Reflections on Fully Rough Materials
We used fully rough materials to save instructions and reduce shading cost on the device. On top of that, we turned off reflection captures on the device to save memory. Instead, we sampled a custom cubemap inside a material function.
One nice side effect was that we could use the same function to reduce the specular flickering, you usually get on reflective materials in the distance on low-resolution devices. We did this by inverting the specular fresnel based on camera distance.
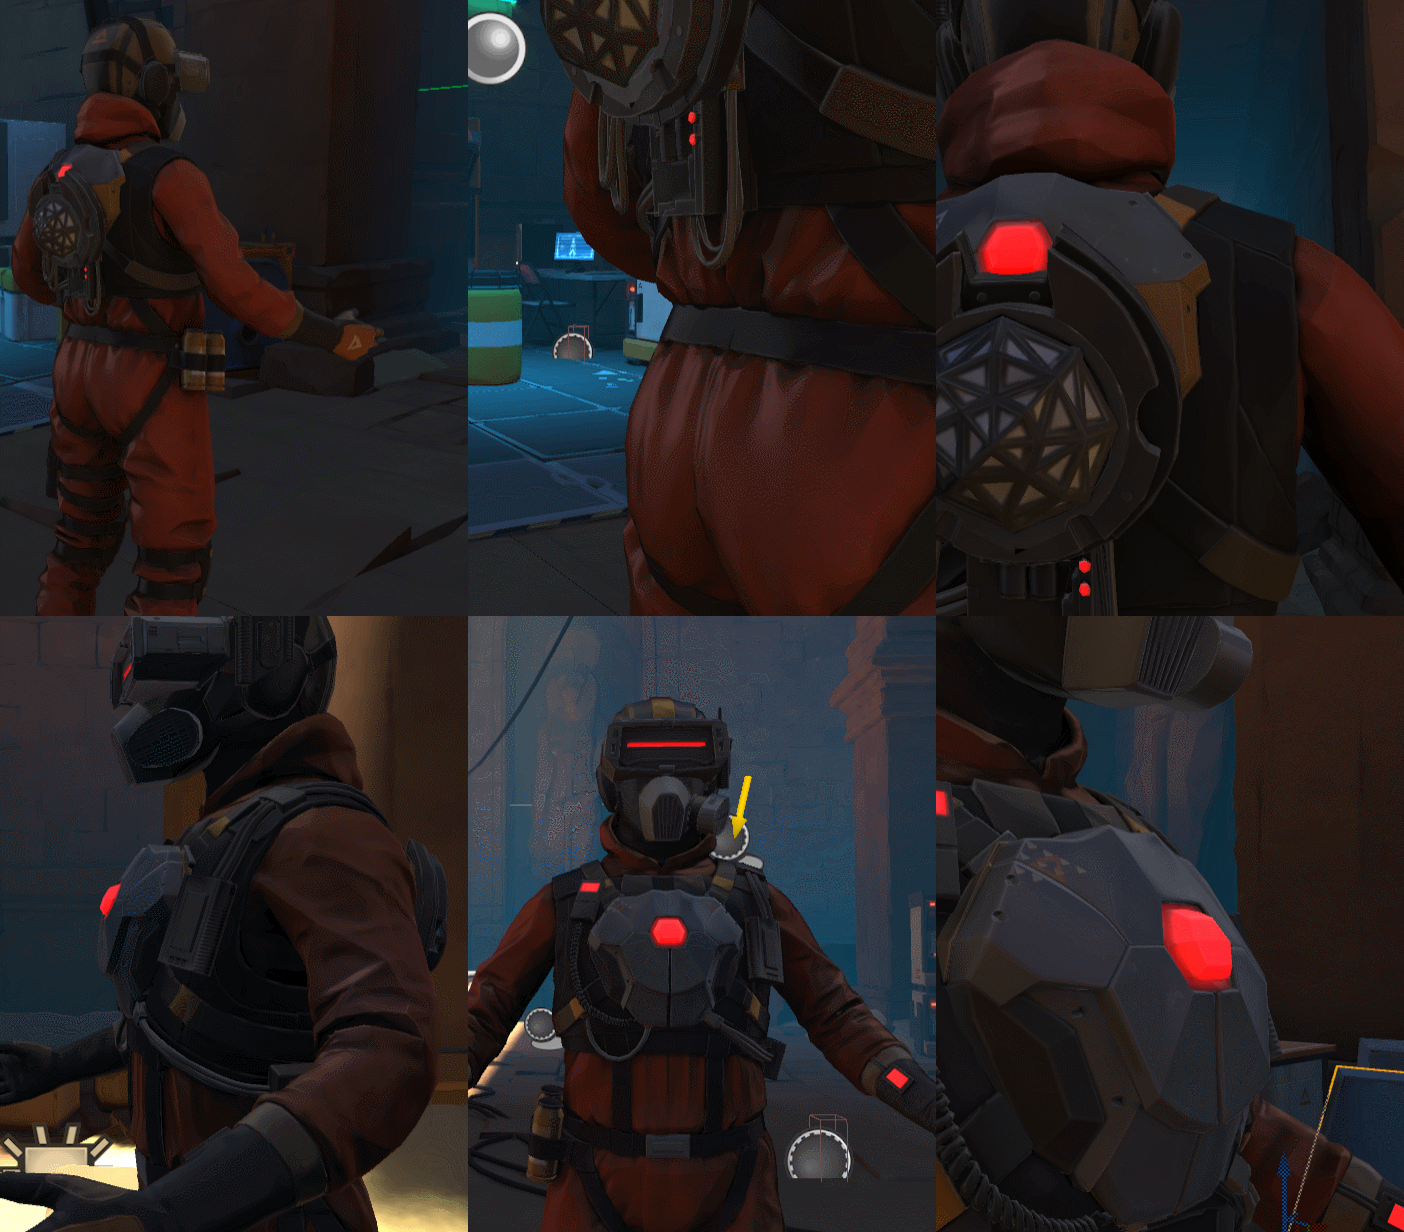
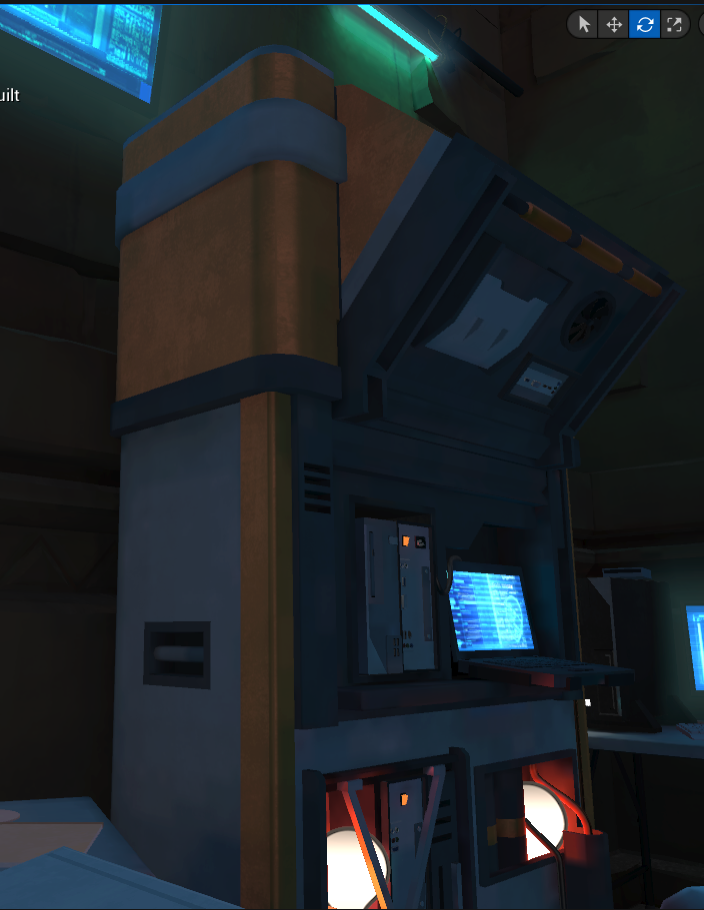
Showing our fake reflection function on our fully rough materials.
The downside of this approach is that you get the same reflection strength in all lighting conditions.
To solve this, I extended the light tool so it could sample the virtual lightmap points.
The tool sampled the VLM at the mesh’s bounding-box center, specifically the VLM’s Z-up value. Then I applied that value to the actor’s custom primitive data. I used this value to drive the reflection strength per actor.
Before and after setting the reflection strength with the tool.
It wasn’t the most elegant solution, but it worked well most of the time as long as the object wasn’t too big.
Lighting Scenarios for Different Hardware
When the headset was linked to a PC, we wanted dynamic shadows without breaking our device bake. The solution was Lighting Scenarios. Each scenario held its own bake and targeted a different hardware. We then loaded a specific light scenario by identifying what device the player was using.
- Quest scenario, used fully static lighting.
- PC scenario, reused the same level but enabled dynamic shadows where they mattered.
The content stayed the same. The primary difference was light mobility. Many lights that were Static in the device scenario were set to Movable in the PC scenario, which gave us dynamic shadows during PC play while keeping the Quest build static.
Ending Notes
In the end, Mannequin’s lighting was not about one solution. It was a handful of practical choices that worked together, tools and a lot of teamwork. I hope you found this helpful or at least interesting. Next time I will write about VR again about how we optimized our titles for the Quest 2.
If you are interested in the tools mentioned in this blog post you can find most of them in my repository.
Comments
Reply on Bluesky to leave a comment.